教程:从单镜头拍摄创建双镜头采访
用两台摄像机拍摄的一对一采访比单台摄像机的采访更有冲击力, 很简单,因为它们可以让你从两个参与者的两张照片剪辑成一个专注于受访者的照片,而不会分散注意力,也不会显得不专业. 那么,当你只有一个摄像头可用的时候,你如何得到两个摄像头的效果? 本教程将解释如何使用Adobe Premiere Pro CS6进行编辑.
在过去的几年里,我们的两个美国流媒体节目中的一个常量就是红毯访谈, a series of interviews we do with speakers, vendors, 以及其他行业权威人士,否则我们将无法在今年剩下的时间里聚集在同一个领域. For several years, 我们外包了这些采访的制作,然后在5月份将项目带到纽约的流媒体东方, 然后在12月洛杉矶的流媒体西部再次亮相.
For me, 这意味着要把一个工具包和一个工作流程放在一起,在紧张的时间表和更紧张的设备预算下完成双相机拍摄和编辑, which presented some interesting challenges. For the interviews at Streaming Media West in November, 这意味着两个不同的工作流程,为两个不同的拍摄天. On the first day of the show, 我有两个非常不同的相机(一个是传统的松下3芯片手持相机), the AG-HMC40, and a large-sensor E-mount Sony NEX-VG20H) to work with. For the interviews on Day Two, 当我的同事从纽约把那台松下电器带回家时,我意外地把它弄丢了. Before my next project of this sort, 我将跟踪第二个使用的VG20,以避免许多此类问题, but for me, as I suspect for many readers, it takes time to get the budget to assemble the kit I want.
与此同时,我还得耍两种花招. For Day One, 这意味着Panny和Sony的画面颜色匹配(对于使用混合设备的读者来说,这并不新鲜)。. But for the Day Two interviews, 我关注的是一些不同的东西:如何用一台相机的镜头复制第一天采访时的双摄像头体验.
我在这些采访中使用双摄像头设置的方法相当传统. Frame one camera as a two-shot (in this case, 松下HMC40),另一个是对受访者的一次性拍摄(在这种情况下), the Sony VG20H), 然后(在大多数情况下)用两个镜头来回答问题,然后切换到一个镜头来回答问题. 除了解决了两个摄像头之间持续存在的色温差异, simple stuff.
The Strategy
但最紧迫的问题是如何在第二天复制这种情况,使两天的采访看起来尽可能一致, as if they were shot and edited in the same way. 我想起了来自diginnovations and KnowledgeVision的Michael Kolowich告诉我的话:互联网上大多数会说话的视频在电脑上都是以部分屏幕图像的形式播放的(显然在移动设备上的播放窗口更小)。, 并且不需要玩家窗口大小或你需要的细节, say, a screencam. So for many reasons, encoding the video at a resolution of 640x360 isn't just sufficient; it's even preferable for playback at lower bitrates.
So I continued to shoot in 1920x1080, 假设我在后期有足够的分辨率来玩,当我从拍摄的镜头中构图两个不同的镜头时:一个640x360的两个镜头的受访者和采访者, and a tight 640x360 one-shot of the interviewee.
The Preset
To begin this project in Adobe Premiere Pro CS6, 我需要做的第一件事是创建一个640x360序列预设. In the New Sequence dialog, I single-clicked the AVCHD 1080p60 setting, then clicked the Settings tab at the top of the window. 在设置选项卡中,我将编辑模式字段设置为自定义,然后调整设置,如下所示 Figure 1, below.
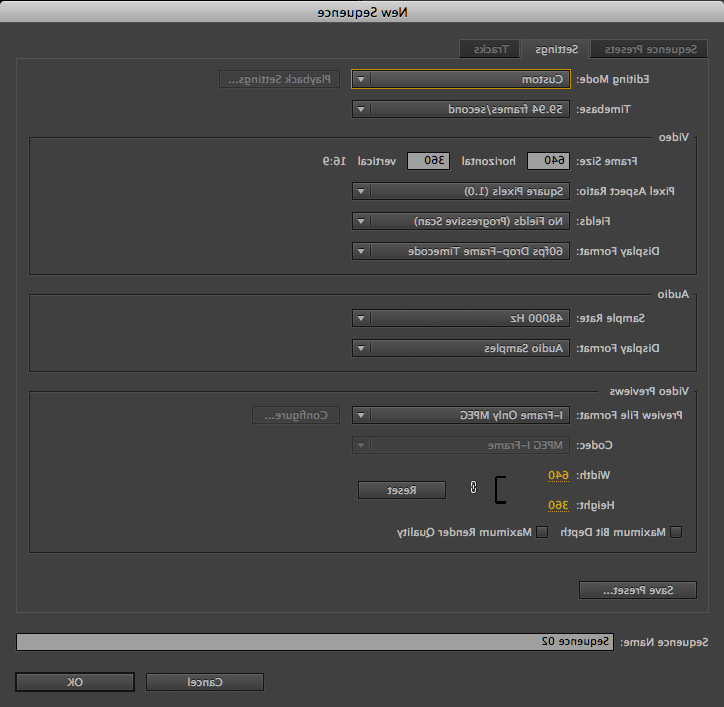
Figure 1. Adjusting New Sequence settings to create a 640x360 frame
Next, 我点击了保存预设按钮,这样我就可以在第二天的所有编辑中使用这个预设. This brought up the Save Settings dialog (Figure 2, below). There, 我给我的预设一个名字和描述,以便将来我再次陷入这种困境时可以识别它, and saved the settings.
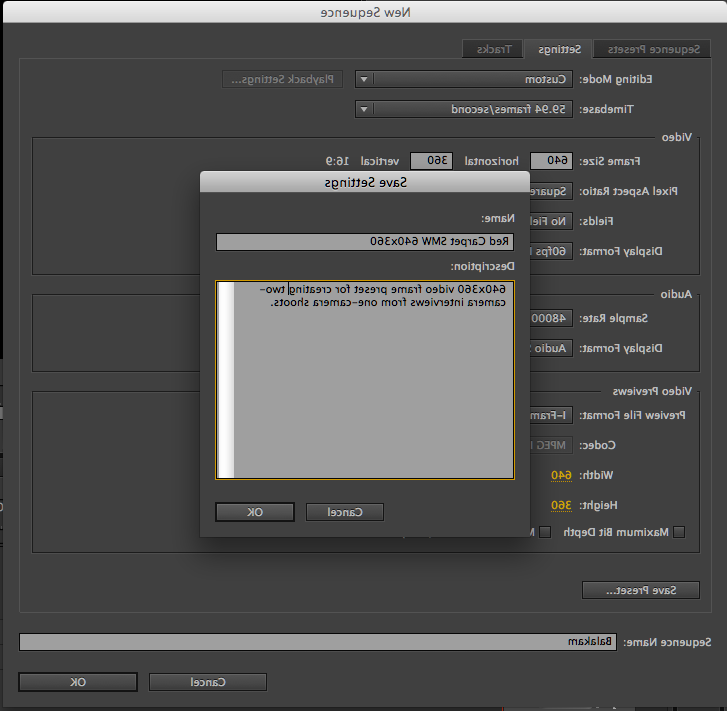
Figure 2. Naming and describing the preset
新的自定义预置现在出现在我的序列预置选项卡中的自定义文件夹中,如下所示 Figure 3 (below). I select it and click OK to select it.
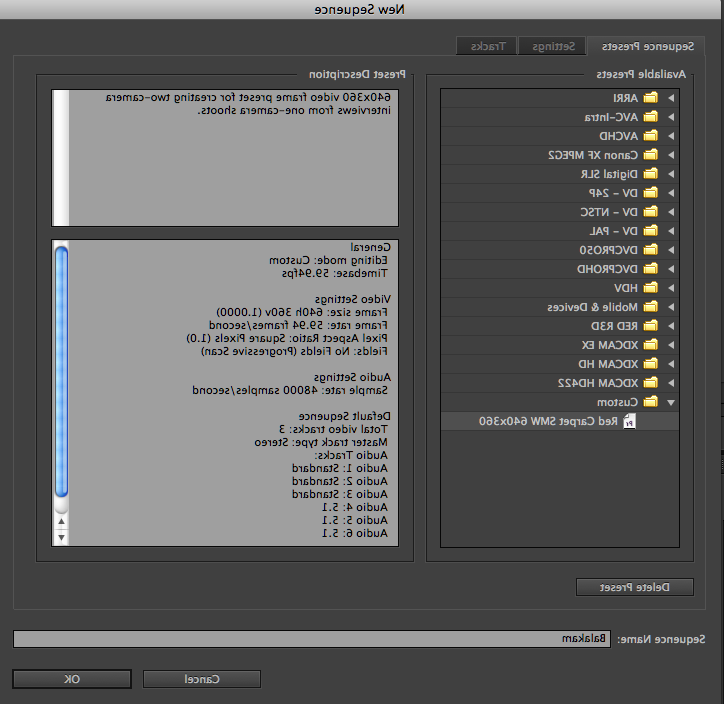
Figure 3. The saved preset